Happy belated Easter! Most bloggers post their holiday recipes before the holiday. I, on the other hand, blog after. There is no rhyme or reason for it, except that I don't make my holiday recipes before the holiday. I need to work on being someone that makes things to lead up to the holiday, not just the day of. Another goal to add to my long list.
Easter. Easter is one of those holidays that really is only fun if you have kids. Do you want to know what I did on my Easter morning? Put these cute little stepping stones in front of our deck stairway.
We are quite the celebrators at the Cundy household. This weekend my husband and father-in-law slaved away and expanded our tiny deck into a big beautiful masterpiece! I will post pictures when it is completed. This weekend, if it actually doesn't rain for a couple of days, Landon and I are planning on staining the deck. Cross my fingers!
I made these carrot cake cheesecake bars for dessert after my mother-in-laws delicious Easter feast. I really really liked them. Awhile back I made this carrot cake cheesecake, and I liked this bars a million times better. They are the perfect amount of cinnamony carrot cake to cheesecake ratio. Although both my husband and my head cook, Karen, thought the cheesecake was a thick dollop of frosting and scraped it right off! What a shame!
Carrot Cake Cheesecake Bars
adapted from Sandra Lee's Red Velvet Cheesecake Bars, as seen on Sweet Treats and More
For the Carrot Cake Bar:
1 box Betty Crocker Carrot Cake Mix
1 egg
1 stick butter, soft
Preheat oven to 350 degrees
Beat the cake mix, egg, and butter until it turns into a thick dough.
Press dough into a greased 9 x 13 inch pan.
Set aside while you make the cheesecake layer.
Cheesecake Layer:
16 oz. cream cheese, soft
1/2 cup sugar
2 eggs
1 tsp vanilla
1. In a medium sized bowl beat the cream cheese until smooth. Add sugar, eggs, and vanilla and continue beating until creamy and smooth.
2. Pour the cheesecake layer over the carrot cake bar in the pan.
Bake for 30-40 minutes or until the edges start to pull away from the pan. Let cool completely.
3. Cut into squares and top each square with a dollop of Betty Crocker's Rich and Creamy Cream Cheese Frosting. I just colored some frosting and put it in a piping bag and made these cute little flowers. Seemed much more fitting for the holiday :).
Even though it's too late to make this for Easter, it is the perfect Spring dessert - flowers and all!
-alyssa*
Showing posts with label cream cheese. Show all posts
red velvet CHEESECAKE!!*
By Unknown
on |
2
comments
I have been DYING to make this since I first saw it! On my first post I had made a red velvet cake, but the recipe I had used was actually for a red velvet cheesecake. A few months ago the husband and I went to Vegas to the Cheesecake Factory for the first time. Just getting there was an adventure in itself, but once we got there I saw it - a red velvet cheesecake!! I was bound and determined to get it for dessert, but then was way to full to even think about it. But I have not forgotten about it ever since. When I came across this recipe in a blog I was immediately in heaven without ever trying it.
Lincoln's Red Velvet Cheesecake Cake
Ingredients
For the cheesecake:
For the cake:
Today we threw a surprise birthday party for one of my staff, Fred, that just turned 85 years old yesterday! I was meaning to take a picture of him today for my blog but completely forgot, but I have a picture that I took a little while ago of him drinking some decaf coffee out of the measuring cup, while eating a muffin HA!
When I get a better picture I will post it. Anyway, everyone LOVES Fred and he has worked for Heritage off and on for about 13 years! So this cake was for him :)
Back to the red velvet CHEESECAKE! First off you make the cheesecake part. There is no crust obviously, so you just make the cheesecake in a spring form pan, then let it chill, take it out of the pan and freeze it. Freezing it makes it easier to put it on the cake without tearing it all the pieces. We actually made the cheesecake part on Friday because the party was on Monday. That way we had time to freeze it and only had to worry about the cake part Monday. It was the first cheesecake I have ever made, at least a cooked cheesecake. I was excited that it didn't have one crack when it came out of the oven! I have an awesome 3 ingredient no bake cheesecake recipe that I am sure will end up on here someday! Anyway, here it goes! Here is the amazing recipe for this show stopping red velvet cheesecake!!
Lincoln's Red Velvet Cheesecake Cake
cake and frosting adapted by Apple a Day, originally adapted from Saveur
cheesecake adapted from Martha StewartIngredients
1 1/4 pounds bar cream cheese (20 oz), room temperature
3/4 cups sugar
1/2 teaspoon finely grated lemon zest, plus 1/2 tablespoon fresh lemon juice
1/4 teaspoon coarse salt
2 large eggs
1/2 cup sour cream
For the cake:
For the cake:
2 1/2 c. cake flour
1 1/2 c. sugar
1 tsp. baking soda
1 TBSP cocoa powder
1 tsp. salt
2 eggs
1 1/2 c. vegetable oil
1 c. buttermilk
2 TBSP (1 oz.) red food coloring
1 tsp. vanilla extract
1 tsp. white distilled vinegar
For the frosting:
12 oz. cream cheese, softened
12 oz. butter, softened
1 1/2 tsp. vanilla extract
3 c. confectioners' sugar
1 bar white or dark chocolate (Optional for decoration), I used Ghiradelli
Directions:
For the cheesecake:
Directions:
For the cheesecake:
Preheat oven to 325 degrees. Set a kettle of water to boil. Using an electric mixer, beat cream cheese on medium until fluffy, scraping down side of bowl. Gradually add sugar, beating until fluffy. Beat in lemon zest and juice, and salt. Beat in eggs, one at a time, scraping down side of bowl after each addition. Beat in sour cream.
Cut parchment paper in a circle and line the bottom of the cheesecake pan.
Wrap bottom half of pan in foil. Pour in filling; place in a roasting pan. Pour in boiling water to come halfway up side of springform. Bake until just set in center, about 45 minutes.
Remove pan from water; let cool 20 minutes. Run a paring knife around edge; let cool completely. Cover; chill overnight, then wrap in plastic wrap and freeze.
For the cake:
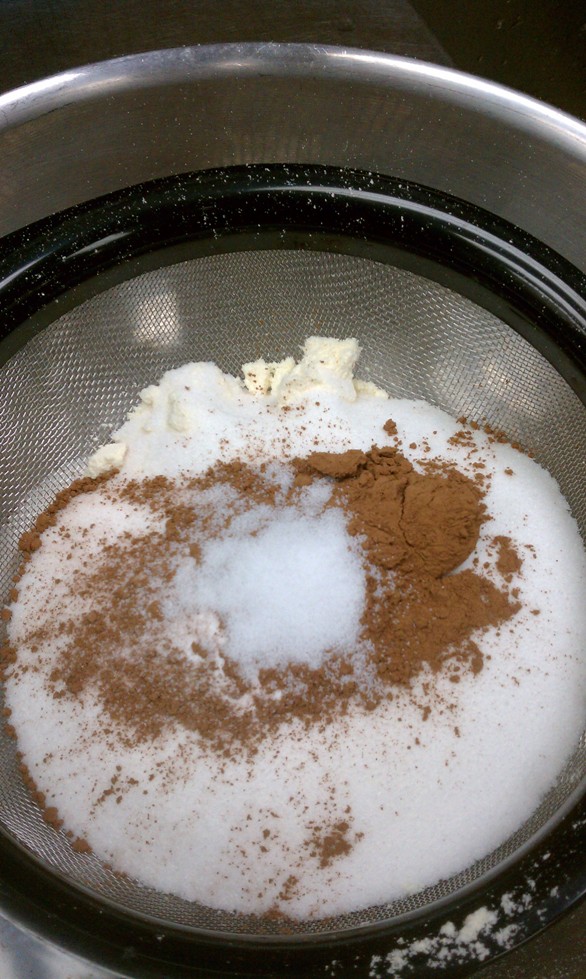
Preheat oven to 350°. Sift together flour, sugar, baking soda, cocoa, and salt into a medium bowl.
Beat eggs, oil, buttermilk, food coloring, vanilla, and vinegar in a large bowl with an electric mixer until well combined. Add dry ingredients and beat until smooth, about 2 minutes.
Divide batter evenly between 2 greased and floured 9" round cake pans.
Bake 25-30 minutes, rotating halfway through, until a toothpick inserted in the center of each cake comes out clean. Let cakes cool 5 minutes, then invert each onto a plate, then invert again onto a cooling rack. Let cakes cool completely, then level.
Frosting:
Frosting:
Beat cream cheese, butter, and vanilla together in a large bowl with an electric mixer until combined. Add sugar and beat until frosting is light and fluffy, 5–7 minutes.
Assembly:
Assembly:
Place bottom layer on cake stand. Remove cheesecake from freezer, unwrap, and remove from metal bottom, then peel off parchment paper. Place cheesecake layer on top of the bottom layer of the red velvet cake. If the cheesecake is wider than the cake, and it is necessary to to trim it, wait approximately 10 minutes for the cheesecake to soften, then trim it with a knife.
Place top layer of cake on top of the cheesecake, and coat with a generous layer of the cream cheese frosting to act as the crumb coat. Be careful not to get any red velvet crumbs in the bowl of frosting! Refrigerate approximately 30 minutes, then frost with as much of the remaining frosting as necessary. Top with shaved white chocolate and/or shaved dark chocolate. Refrigerate until ready to serve. (This cake doesn't have to stay in the fridge until IMMEDIATELY before serving, so don't worry if you have a 30 minute lapse between the refrigerator and serving.)
Oh my goodness gracious! This dessert did not disappoint! I will absolutely be making this again when I have somewhere fancy to go. I must also mention that I couldn't have made this without my best assistant, Sarah. Well, I maybe could have but it would have taken me 10 times longer because my phone does not seem to ever stop ringing. So THANKS Sarah!! We did it again :)
-alyssa*
first blog*
By Unknown
on |
1 comments
Yay, I am officially now a blogger! I still am not quite sure what I am doing, but I am sure I will learn along the way. I guess I will start by telling you a little bit about me. I am 24 yrs old and I am married to the most amazing man I have ever met. We have been married 3 1/2 yrs and we have a little yorkie named Tank and he is 3 yrs old. He is the most spoiled puppy ever! Actually, I am quite sure he doesn't even know he is a puppy. My hobbies are cooking (obviously) and shopping. I am a GREAT shopper! I am usually so busy I don't actually make it to the store, but I can find something online like it's no ones business!
Let me tell you a little bit about where I work. I work at Heritage Schools, Inc., which is a residential treatment center for youth ages 12-18. We can hold up to 175 students, but currently have about 150 on average, and we have about 350 staff. You should definitely check it out, it's pretty awesome! Anyway, where I fit in with all the madness is that I am the Director of Food Services. What does that mean, you ask?? Well, basically it means I am the one responsible for trying to make 150 TEENAGE kids happy with the food they eat! Quite the task as you can imagine. I am currently making some new menus and have been looking at food blogs like crazy. I am actually surprised my printer hasn't given way on me yet! Then, just yesterday actually, I decided that I should start to blog my creations. When I am looking for recipes there is hardly ever any that are meant to be made for 150+, but I refuse to stick to only hamburgers, casseroles and spaghetti. I am on the constant search for recipes that I can modify and make them work in my area. So, welcome! If you have any suggestions or ideas PLEASE feel free to fill me in!
So that's a little bit about me. Now, let's get down to business. I am going to start with a birthday cake that I made yesterday for one of the students. They wanted a red velvet cake, which I was ecstatic about because I have wanted to make this recipe for quite sometime. The one that I actually found was on Erin's Food Files, but it is actually a red velvet CHEESECAKE! Can you say YUMMY?!! I am actually planning on making this on the 17th because one of my staff is turning 85!! Yes, you heard me right, EIGHTY-FIVE! He doesn't know it, but there is a surprise party a-brewin and a red velvet cheesecake will be served!
Anyway, back to my cake. I used this recipe, but left out the cheesecake part. I thought that I would need more frosting than what it called for because 1. I usually always need more frosting and 2. that cake didn't have frosting in the middle. So I doubled the frosting recipe and actually had enough for a whole other cake! But I LOVED how this cake turned out and even though I only got to eat some of the crumbs that I had left over for the top with a little spoonful of cream cheese frosting, that little bit I had tasted was AMAZING! When it was in the oven it actually smelled like a sugar cookie, and kind of tasted like one too. It was SO good! I did think there would be more cocoa powder in the recipe though...but then again I have never made a red velvet cake so what do I know :)
Lincoln's Red Velvet Cake
cake and frosting adapted from Apple a Day
For the cake:
2 1/2 c. cake flour
1 1/2 c. sugar
1 tsp. baking soda
1 TBSP cocoa powder
1 tsp. salt
2 eggs
1 1/2 c. vegetable oil
1 c. buttermilk
2 TBSP (1 oz.) red food coloring
1 tsp. vanilla extract
1 tsp. white distilled vinegar
For the frosting:
12 oz. cream cheese, softened
12 oz. butter, softened
1 1/2 tsp. vanilla extract
3 c. confectioners' sugar
1 bar white or dark chocolate (Optional for decoration), I used Ghiradelli Semi-Sweet Chocolate
Preheat oven to 350°. Sift together flour, sugar, baking soda, cocoa, and salt into a medium bowl.
Beat eggs, oil, buttermilk, food coloring, vanilla, and vinegar in a large bowl with an electric mixer until well combined. Add dry ingredients and beat until smooth, about 2 minutes.
Divide batter evenly between 2 greased and floured 9" round cake pans and bake 25-30 minutes, rotating halfway through, until a toothpick inserted in the center of each cake comes out clean. Let cakes cool 5 minutes, then invert each onto a plate, then invert again onto a cooling rack. Let cakes cool completely, then level.
Frosting:
Beat cream cheese, butter, and vanilla together in a large bowl with an electric mixer until combined. Add sugar and beat until frosting is light and fluffy, 5–7 minutes.
Assembly:
Place bottom layer on cake stand. To get the crumbs on top, I leveled the bottom layer with a knive and saved the extra for the top. Frost only the top of the layer with cream cheese frosting. Place the top layer of the cake on top of the bottom layer and coat with a generous layer of the cream cheese frosting to act as the crumb coat. Be careful not to get any red velvet crumbs in the bowl of frosting! Refrigerate approximately 30 minutes, then frost with as much of the remaining frosting as necessary. Top with shaved white chocolate and/or shaved dark chocolate and the crumbs that were saved earlier. Refrigerate until ready to serve.
I wish I had a picture of what a slice looks like, but I don't think the birthday boy would have appreciated it :) HAPPY EATING!
-alyssa*
Let me tell you a little bit about where I work. I work at Heritage Schools, Inc., which is a residential treatment center for youth ages 12-18. We can hold up to 175 students, but currently have about 150 on average, and we have about 350 staff. You should definitely check it out, it's pretty awesome! Anyway, where I fit in with all the madness is that I am the Director of Food Services. What does that mean, you ask?? Well, basically it means I am the one responsible for trying to make 150 TEENAGE kids happy with the food they eat! Quite the task as you can imagine. I am currently making some new menus and have been looking at food blogs like crazy. I am actually surprised my printer hasn't given way on me yet! Then, just yesterday actually, I decided that I should start to blog my creations. When I am looking for recipes there is hardly ever any that are meant to be made for 150+, but I refuse to stick to only hamburgers, casseroles and spaghetti. I am on the constant search for recipes that I can modify and make them work in my area. So, welcome! If you have any suggestions or ideas PLEASE feel free to fill me in!
So that's a little bit about me. Now, let's get down to business. I am going to start with a birthday cake that I made yesterday for one of the students. They wanted a red velvet cake, which I was ecstatic about because I have wanted to make this recipe for quite sometime. The one that I actually found was on Erin's Food Files, but it is actually a red velvet CHEESECAKE! Can you say YUMMY?!! I am actually planning on making this on the 17th because one of my staff is turning 85!! Yes, you heard me right, EIGHTY-FIVE! He doesn't know it, but there is a surprise party a-brewin and a red velvet cheesecake will be served!
Anyway, back to my cake. I used this recipe, but left out the cheesecake part. I thought that I would need more frosting than what it called for because 1. I usually always need more frosting and 2. that cake didn't have frosting in the middle. So I doubled the frosting recipe and actually had enough for a whole other cake! But I LOVED how this cake turned out and even though I only got to eat some of the crumbs that I had left over for the top with a little spoonful of cream cheese frosting, that little bit I had tasted was AMAZING! When it was in the oven it actually smelled like a sugar cookie, and kind of tasted like one too. It was SO good! I did think there would be more cocoa powder in the recipe though...but then again I have never made a red velvet cake so what do I know :)
Lincoln's Red Velvet Cake
cake and frosting adapted from Apple a Day
For the cake:
2 1/2 c. cake flour
1 1/2 c. sugar
1 tsp. baking soda
1 TBSP cocoa powder
1 tsp. salt
2 eggs
1 1/2 c. vegetable oil
1 c. buttermilk
2 TBSP (1 oz.) red food coloring
1 tsp. vanilla extract
1 tsp. white distilled vinegar
For the frosting:
12 oz. cream cheese, softened
12 oz. butter, softened
1 1/2 tsp. vanilla extract
3 c. confectioners' sugar
1 bar white or dark chocolate (Optional for decoration), I used Ghiradelli Semi-Sweet Chocolate
Directions:
Cake:Preheat oven to 350°. Sift together flour, sugar, baking soda, cocoa, and salt into a medium bowl.
Beat eggs, oil, buttermilk, food coloring, vanilla, and vinegar in a large bowl with an electric mixer until well combined. Add dry ingredients and beat until smooth, about 2 minutes.
Divide batter evenly between 2 greased and floured 9" round cake pans and bake 25-30 minutes, rotating halfway through, until a toothpick inserted in the center of each cake comes out clean. Let cakes cool 5 minutes, then invert each onto a plate, then invert again onto a cooling rack. Let cakes cool completely, then level.
Frosting:
Beat cream cheese, butter, and vanilla together in a large bowl with an electric mixer until combined. Add sugar and beat until frosting is light and fluffy, 5–7 minutes.
Assembly:
Place bottom layer on cake stand. To get the crumbs on top, I leveled the bottom layer with a knive and saved the extra for the top. Frost only the top of the layer with cream cheese frosting. Place the top layer of the cake on top of the bottom layer and coat with a generous layer of the cream cheese frosting to act as the crumb coat. Be careful not to get any red velvet crumbs in the bowl of frosting! Refrigerate approximately 30 minutes, then frost with as much of the remaining frosting as necessary. Top with shaved white chocolate and/or shaved dark chocolate and the crumbs that were saved earlier. Refrigerate until ready to serve.
I wish I had a picture of what a slice looks like, but I don't think the birthday boy would have appreciated it :) HAPPY EATING!
-alyssa*
Subscribe to:
Posts (Atom)