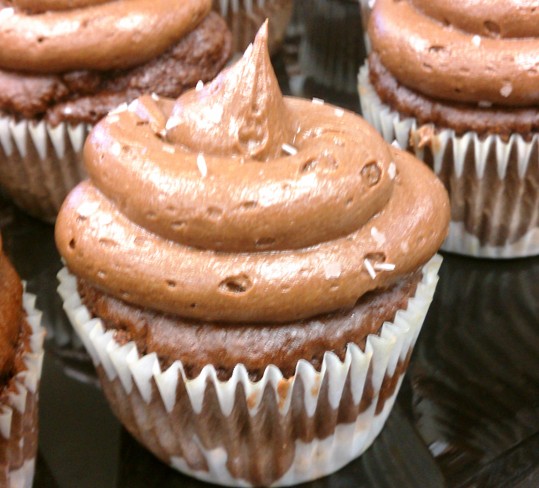
Sprinkles. I don't understand the dang things. They are just a crunchy, hard, tasteless, useless ornament that I just simply don't get. Which brings me to funfetti cake. I don't understand funfetti cake, either. I know, I know, you are thinking - OH MY GOSH I LOVE FUNFETTI CAKE! That's fine. Love it all you like. I am sure that Pillsbury appreciates you. Me on the other hand, not a fan.
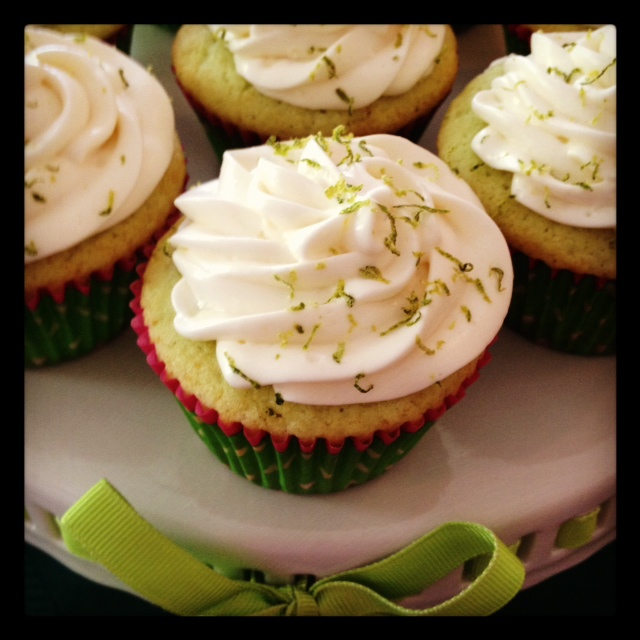
Which brings me to these cupcakes. I am a HUGE fan of these cupcakes! They are the bees knees! The original recipe doesn't add any lime juice in the frosting, but I can't imagine it without it! I don't think the lime flavor would be nearly as prominent in just the cake alone. I also have a secret, I used regular limes! I wasn't about to zest and juice a million key limes. I've got things to do people! You must, I say MUST, make these for your next BBQ, family function, church activity, or heck - just make them for yourself and eat the whole batch!! I won't tell, I promise :).
Key Lime Cupcakes
adapted from My Madison Bistro, whom adapted from Bon Appetit, Sept. 2008
Showing posts with label cupcake. Show all posts
raspberry filled vanilla cupcakes w/ vanilla buttercream frosting*
By Unknown
on |
0
comments
Last night I finally broke down and downloaded the Draw Something app on my phone and made the hubby play with me. Oh, my cute little husband. He is so funny and doesn't even try. If you have never played before, it is just like Pictionary. It lets you watch your opponent draw their picture and make mistakes and erase and start over until they finally have their finished product. Well, I was watching the hubs draw his word with my thinking cap on, just trying to get it in record time. He kept erasing over and over, and each thing he tried to draw was completely different, just leaving me more and more confused. And then I thought for sure I got it. He was drawing a dinosaur with a spiky mohawk! Then he erased and drew an American flag with "42 cents" written in the corner. Evidently his word was "stamp". So I asked him where the dinosaur came into play. What I thought was a dinosaur, was actually the Statue of Liberty. Oh man...hahaha. I was laughing so hard I was crying. Definitely my new favorite game! If nothing else, it cracks me up!
These cupcakes were the dessert at the sports banquet on Wednesday. The blog I got the recipe from suggested ways to make your store bought cake mix taste homemade, so I followed those instructions. Although, I think each store bought cake mix is different because all of the extra ingredients just made my cupcakes fall apart easily. You live, you learn. Homemade is the way to go!
I think I also kind of got anxious with my filling, because I don't think I let it boil long enough and get as thick as it needed to be. Once it cooled down and I added my raspberries, it wasn't as thick and I wanted it to be. So I added some whipped topping to make it thicker. So if you find yourself in the same predicament, I would suggest adding about 1/2 cup to 1 cup of whipped topping to your filling. It still tastes amazing!
Raspberry Filled Vanilla Cupcakes w/ Vanilla Buttercream Frosting
adapted from Tidy Mom
These cupcakes were the dessert at the sports banquet on Wednesday. The blog I got the recipe from suggested ways to make your store bought cake mix taste homemade, so I followed those instructions. Although, I think each store bought cake mix is different because all of the extra ingredients just made my cupcakes fall apart easily. You live, you learn. Homemade is the way to go!
I think I also kind of got anxious with my filling, because I don't think I let it boil long enough and get as thick as it needed to be. Once it cooled down and I added my raspberries, it wasn't as thick and I wanted it to be. So I added some whipped topping to make it thicker. So if you find yourself in the same predicament, I would suggest adding about 1/2 cup to 1 cup of whipped topping to your filling. It still tastes amazing!
Raspberry Filled Vanilla Cupcakes w/ Vanilla Buttercream Frosting
adapted from Tidy Mom
red velvet chocolate chip cupcakes*
By Unknown
on |
0
comments
No better way to ring in the New Year (I know I'm a bit late) then with an absolutely divine dessert! These little babies were dessert for the students last week, and were an amazing little treat (a.k.a. the last amazing thing we are going to eat for 3 months) for me and my staff before we started in on the Biggest Loser. I was excited that there were a couple left the next day so that I could devour one just before the weigh-ins. You may call it cheating, but I call it just another part of my cupcake top - or as everyone else calls it "muffin top".
Red Velvet Chocolate Chip Cupcakes with Chocolate Cream Cheese Frosting
from Gingerbread Bagels
Red Velvet Chocolate Chip Cupcakes with Chocolate Cream Cheese Frosting
from Gingerbread Bagels
apple pie cupcakes*
By Unknown
on |
2
comments
I am so deeply in love with these cupcakes that it is almost a problem. Although I have not made them more than once (yet), I have a feeling that these are going to be in my life for the long haul. I want to make more apple, some cherry, mixed berry, well basically any kind of flavor that would normally be a pie, then make it into a cupcake! They turned out so dang cute, and they tasted even better! But grab a fork people, because this is no eat-and-go dessert. Unless you want to skimp on the filling, and if you do that then shame on you!
The recipe called for a vanilla buttercream frosting, but I am sorry but I HAVE to have whipped topping on my "pie"! So instead I made some homemade spiced whipped cream, and you will notice some little specks in the picture. That is cinnamon people! Someone told me that they are going to buy me an industrial sized container of cinnamon for Christmas because I use it so much. Although she was kidding, I didn't think it was a bad idea :).
Apple Pie Cupcakes
adapted from Annie's Eats
The recipe called for a vanilla buttercream frosting, but I am sorry but I HAVE to have whipped topping on my "pie"! So instead I made some homemade spiced whipped cream, and you will notice some little specks in the picture. That is cinnamon people! Someone told me that they are going to buy me an industrial sized container of cinnamon for Christmas because I use it so much. Although she was kidding, I didn't think it was a bad idea :).
Apple Pie Cupcakes
adapted from Annie's Eats
pumpkin cupcake w/ salted caramel buttercream*
By Unknown
on |
0
comments
It seems like salted caramel is the new "thing". It is everywhere. I have always thought it sounded good, but really didn't get the big deal. Then I made it for this buttercream. Man oh man, this stuff is GOOD. I was skeptical about the buttercream, since I really am not a huge fan, but this buttercream is pretty tasty. I am still not the biggest fan of the texture, but the salted caramel flavor is really so amazing!
So, I found this recipe on Pinterest - of course - and tried to follow it word for word. But this was my problem. The cupcakes turned out fabulously. Really - so good! Then I got to the frosting. I tried to make the "salted caramel" twice, then gave up. In the recipe it says to let the sugar and water boil until it reaches a deep amber color. The first time I tried to wing it, while not really 100% sure what a deep amber color looked like. When I added my cream to mix in once it had reached what I thought was deep amber, the caramel got hard as a rock and the cream did not mix in at all. So I knew I cooked it too long. So I tried again. This time, however, I decided to Google what deep amber looks like. That was as much help as trying to get my puppy help me bake. Please, I beg you, Google what deep amber looks like. It is about as clear as mud. So I decided I would just let it be a bit lighter than my first attempt and was really feeling good about it this time. I added my cream, and again - hard as a rock. This is when I gave up. At least on that caramel recipe.
I decided to look up another recipe for a salted caramel buttercream, but I wanted one that used a candy thermometer so that there was no color guessing, no texture guessing. I wanted crystal clear directions. After looking over a few recipes, I still couldn't find one that used a candy thermometer. However, I decided to just pick one and try it.
These were my directions. Simmer until thickened; about 3-4 minutes. Ugh. How thickened would they like it to be? I had no idea. I attempted to guess for awhile, at least to what my idea of what the thickness should be, which was way longer than 3-4 minutes I might add, until I had a genius idea. I have made caramel a time or two and decided that I would just use a candy thermometer anyway. I figured if I let it get to about 230 degrees, just under soft ball stage, that it would work great because it would still be pourable, yet still have a firmness to it. So that is what I did, and it WORKED! Yay. You can try and guess if you would like, and if it works my hat goes off to you. I need much more clear directions, because I am just simply not that cool.
Pumpkin Cupcakes w/ Salted Caramel Buttercream
cupcake recipe from Made In Mel's Kitchen
So, I found this recipe on Pinterest - of course - and tried to follow it word for word. But this was my problem. The cupcakes turned out fabulously. Really - so good! Then I got to the frosting. I tried to make the "salted caramel" twice, then gave up. In the recipe it says to let the sugar and water boil until it reaches a deep amber color. The first time I tried to wing it, while not really 100% sure what a deep amber color looked like. When I added my cream to mix in once it had reached what I thought was deep amber, the caramel got hard as a rock and the cream did not mix in at all. So I knew I cooked it too long. So I tried again. This time, however, I decided to Google what deep amber looks like. That was as much help as trying to get my puppy help me bake. Please, I beg you, Google what deep amber looks like. It is about as clear as mud. So I decided I would just let it be a bit lighter than my first attempt and was really feeling good about it this time. I added my cream, and again - hard as a rock. This is when I gave up. At least on that caramel recipe.
I decided to look up another recipe for a salted caramel buttercream, but I wanted one that used a candy thermometer so that there was no color guessing, no texture guessing. I wanted crystal clear directions. After looking over a few recipes, I still couldn't find one that used a candy thermometer. However, I decided to just pick one and try it.
These were my directions. Simmer until thickened; about 3-4 minutes. Ugh. How thickened would they like it to be? I had no idea. I attempted to guess for awhile, at least to what my idea of what the thickness should be, which was way longer than 3-4 minutes I might add, until I had a genius idea. I have made caramel a time or two and decided that I would just use a candy thermometer anyway. I figured if I let it get to about 230 degrees, just under soft ball stage, that it would work great because it would still be pourable, yet still have a firmness to it. So that is what I did, and it WORKED! Yay. You can try and guess if you would like, and if it works my hat goes off to you. I need much more clear directions, because I am just simply not that cool.
Pumpkin Cupcakes w/ Salted Caramel Buttercream
cupcake recipe from Made In Mel's Kitchen
cherry limeade cupcakes*
By Unknown
on |
2
comments
Last week we had a luau for the students, which also happened to be our first BBQ of the summer. No, I did not just get the memo that it has been summer for the last several months, but because of different restrictions from the health department it is really quite the process to be able to cook outside. However, we got a temporary event permit, so I decided that we needed to make it more than just a plain old BBQ - and what better way than to have a fun luau! We had decorations and leis and of course - some cherry limeade cupcakes topped with a little paper umbrella! LOVE IT.
I really liked the lime cupcake, but I must admit - the cherry frosting really didn't do it for me. It didn't have a very cherry distinct flavor, and I absolutely love cherries, so that was a huge disappointment. I even added extra juice from the maraschino cherries, but it still wasn't very cherry-y. But the cupcake - so good!!! My suggestion: add even more of the juice or possibly get some cherry flavor extract. (I have a confession, I didn't know if cherry flavor extract existed - so I just googled it. It does! Phew.)
Cherry Limeade Cupcakes
from Java Cupcake
I really liked the lime cupcake, but I must admit - the cherry frosting really didn't do it for me. It didn't have a very cherry distinct flavor, and I absolutely love cherries, so that was a huge disappointment. I even added extra juice from the maraschino cherries, but it still wasn't very cherry-y. But the cupcake - so good!!! My suggestion: add even more of the juice or possibly get some cherry flavor extract. (I have a confession, I didn't know if cherry flavor extract existed - so I just googled it. It does! Phew.)
Cherry Limeade Cupcakes
from Java Cupcake
cherry cheesecake cupcakes*
By Unknown
on |
1 comments
I have been wanting to make these cupcakes forEVER! Ok, maybe only a few months, but I should have thought of this idea forever ago! I was thinking that I would just make it with a white cake cupcake, but then I had this thought. I wonder if there was a recipe for a graham cracker cake batter?? And alas, THERE IS!! With some minor adaptations to the recipe, it was the perfect cupcake to house some yummy cherry pie filling with a no bake cheesecake swirl topping, a cherry puree drizzle, then finished off with a piece of graham cracker. AMAZING! My new FAVORITE cupcake - I think I say that a lot...!! :)
The no-bake cheesecake filling I have been using for years. Like-since I was probably 13. It is so amazing and SO easy. Especially with a homemade graham cracker crust and raspberry topping. So you want a quick and easy cheesecake recipe, use that filling and make yourself a yummy cheesecake. I don't know why I never thought of using it as a frosting until now. But it is my new favorite discovery!
anniversary, babies & chocolate pretzel caramel cream cupcakes*
By Unknown
on |
2
comments
Today is my 4 year anniversary of the day that I married my best friend, Landon Cundy. I don't know how I got so lucky! He truly is the most amazing man I have ever met, and I am so happy to call him my husband! Let me fill you in on a couple reasons why I love this man.
*He is such a hard worker. He takes so much pride in every little thing that he does. If something is going to have his name on it or if he is associated with it, it will be perfect. We both have the same amount of drive and ambition when it comes to everything we do, especially our jobs. I love that he takes everything he does to the next level and really strives to be the best at everything he does.
*I don't remember the last time I vacuumed because he vacuums nearly each and every week. I don't know if it is because he likes to vacuum, or because he is in love with our Dyson. Either way, I'm not complaining! He is also a very clean person. He is actually more of a clean freak than I am, and I love it!
*He LOVES yardwork. A couple of years back we bought his grandma's house that his mom grew up in. His grandma was known for having a perfect yard. Well, she demanded a perfect yard was more like it :). None the less, Landon has more than happily carried on that tradition. Our yard is my very favorite part of our house, and it is all thanks to my hubby.
*He is perfectly content to just chill. He doesn't have to be doing something at all times of the day. When I am not working and have had a very busy week, the only thing I want to do is sit down, snuggle with my husband and puppy, and watch a good movie. Landon is exactly the same. I could never be married to someone that has to be doing something at all times. I need my down time to function, and Landon is cool with that.
*Landon loves to hang out with just me and him. Some couples always have to be doing something with other people, otherwise they don't have much fun. Landon and I couldn't be more opposite of that kind of couple. He loves to hang out with just me and I LOVE to hang out with just him. We truly are best friends in every sense of the word. We don't need a bunch of other people around to be happy. However, we do need our puppy, Tankers. I don't know what we would do without him :).
*Last, but not least (because I need to wrap this thing up), he loves me. He doesn't pick fights with me over something stupid and always makes me feel like I am important. He puts up with my occasional "girl moments" and dramatics, and is a very good listener. He must truly love me, to put up with me for the last four years! I LOVE YOU LANDON!
Next item on the agenda: BABY! My little sister, Shea, gave birth to a beautiful baby boy on Tuesday, June 21st. Xander Joseph Swan was born at 8:24 p.m. - ish :), and he was 6 lbs. 14 oz. and 20 inches long. He is SO CUTE and little and has a ton of blonde hair! We still can't tell who he looks like more, mommy or daddy, but we did confirm that he definitely has Shea's ears! :)
How cute is he?? Aunt Alyssa loves you!!!
Now, let's get down to business. Just thinking of making these cupcakes and dreaming of what they would taste like literally made me drool! The blog I found them on actually made a chocolate peanut butter pretzel cupcake. I thought that a caramel cream in the middle sounded so amazing, so I decided to forgo the peanut butter cup middle. Although I am absolutely positive that having that peanut butter cup middle would be to die for as well!
I truly loved this cupcake. I was worried that after adding the brown sugar and butter to the pretzels that they wouldn't be all that salty anymore. They were still plenty salty! One of my staff actually didn't like them very much because she thought they were too salty. I thought they were perfect. I also sprinkled some kosher salt on top, too, so maybe that was what did her in. My only complaint is that I wish the pretzels would have remained a little more crunchy. They were softened just a little bit from the butter and brown sugar, and also from the cupcake batter on top. But they were SO yummy and really reminded me of a chocolate and caramel covered pretzel! Which was exactly what I was going for :).
Chocolate Pretzel Caramel Cream Cupcakes
adapted from Did Someone Say Party?
(makes 3 dozen cupcakes)
Ingredients:
Pretzel Crust
1 cup milk
1 teaspoon vanilla
1 cup butter
1 cup granulated sugar (not Powdered Sugar!)
1/2 cup caramel topping
Directions:
Preheat oven to 350 degrees F (175 degrees C). Crush the pretzels. I used a food processor, but putting the pretzels in a ziploc bag and crushing them that way works, too. You want to get them pretty fine so you can get an even layer.
In a medium bowl, mix together the crust ingredients. Drop a small scoop of the crust mixture into the bottom of each cup (either a sprayed muffin pan or silicone cups). Use a small glass to pack them down to a firm crust. Bake for 8-10 minutes. Set aside to cool.
While those are baking, combine all the batter ingredients. Mix well until the batter is well combined. Drop a small spoonful of batter onto each pretzel crust. Bake at 350 degrees for 20-22 minutes until a toothpick inserted in the center comes out clean. While cupcakes are cooling, make the caramel cream filling!
To make the filling, in a small saucepan, whisk flour into milk and heat, stirring constantly, until it thickens. You want it to be very thick, thicker than cake mix, more like a brownie mix is. Remove from heat and let it cool to room temperature. It must be completely cool before you use it in the next step. Stir in vanilla.
While the mixture is cooling, cream the butter and sugar together until light and fluffy. You don’t want any sugar graininess left. Then add the completely cooled milk/flour/vanilla mixture as well as the caramel topping and beat it for about 10 minutes. That may seem like a long time, but believe me it makes it so light and fluffy and SO AMAZING. If it looks separated, you haven’t beaten it enough! Beat it until it all combines and resembles whipped cream. If it seems really runny, then add a little bit of powdered sugar. I needed to add just a little, and then it was PERFECT!
Hull the cupcakes the make a perfect little nest for the caramel cream.
I used a big star tip to fill the cupcake holes. Make sure they are filled all the way to the top, because you are not going to want to skimp on this stuff!
Finally, make the frosting! Cream 1 cup of softened butter with a mixer. Gradually beat in confectioners' sugar, cocoa and vanilla. Add milk until frosting reaches spreading consistency.
Time to frost! I used a pastry bag with no tip and did a swirl. After frosting, sprinkle some sea salt on the top for a finishing touch!
And finally, DIG IN!
Salty yet sweet amazingness!
-alyssa*
*He is such a hard worker. He takes so much pride in every little thing that he does. If something is going to have his name on it or if he is associated with it, it will be perfect. We both have the same amount of drive and ambition when it comes to everything we do, especially our jobs. I love that he takes everything he does to the next level and really strives to be the best at everything he does.
*I don't remember the last time I vacuumed because he vacuums nearly each and every week. I don't know if it is because he likes to vacuum, or because he is in love with our Dyson. Either way, I'm not complaining! He is also a very clean person. He is actually more of a clean freak than I am, and I love it!
*He LOVES yardwork. A couple of years back we bought his grandma's house that his mom grew up in. His grandma was known for having a perfect yard. Well, she demanded a perfect yard was more like it :). None the less, Landon has more than happily carried on that tradition. Our yard is my very favorite part of our house, and it is all thanks to my hubby.
*He is perfectly content to just chill. He doesn't have to be doing something at all times of the day. When I am not working and have had a very busy week, the only thing I want to do is sit down, snuggle with my husband and puppy, and watch a good movie. Landon is exactly the same. I could never be married to someone that has to be doing something at all times. I need my down time to function, and Landon is cool with that.
*Landon loves to hang out with just me and him. Some couples always have to be doing something with other people, otherwise they don't have much fun. Landon and I couldn't be more opposite of that kind of couple. He loves to hang out with just me and I LOVE to hang out with just him. We truly are best friends in every sense of the word. We don't need a bunch of other people around to be happy. However, we do need our puppy, Tankers. I don't know what we would do without him :).
*Last, but not least (because I need to wrap this thing up), he loves me. He doesn't pick fights with me over something stupid and always makes me feel like I am important. He puts up with my occasional "girl moments" and dramatics, and is a very good listener. He must truly love me, to put up with me for the last four years! I LOVE YOU LANDON!
Next item on the agenda: BABY! My little sister, Shea, gave birth to a beautiful baby boy on Tuesday, June 21st. Xander Joseph Swan was born at 8:24 p.m. - ish :), and he was 6 lbs. 14 oz. and 20 inches long. He is SO CUTE and little and has a ton of blonde hair! We still can't tell who he looks like more, mommy or daddy, but we did confirm that he definitely has Shea's ears! :)
How cute is he?? Aunt Alyssa loves you!!!
Now, let's get down to business. Just thinking of making these cupcakes and dreaming of what they would taste like literally made me drool! The blog I found them on actually made a chocolate peanut butter pretzel cupcake. I thought that a caramel cream in the middle sounded so amazing, so I decided to forgo the peanut butter cup middle. Although I am absolutely positive that having that peanut butter cup middle would be to die for as well!
I truly loved this cupcake. I was worried that after adding the brown sugar and butter to the pretzels that they wouldn't be all that salty anymore. They were still plenty salty! One of my staff actually didn't like them very much because she thought they were too salty. I thought they were perfect. I also sprinkled some kosher salt on top, too, so maybe that was what did her in. My only complaint is that I wish the pretzels would have remained a little more crunchy. They were softened just a little bit from the butter and brown sugar, and also from the cupcake batter on top. But they were SO yummy and really reminded me of a chocolate and caramel covered pretzel! Which was exactly what I was going for :).
Chocolate Pretzel Caramel Cream Cupcakes
adapted from Did Someone Say Party?
(makes 3 dozen cupcakes)
Ingredients:
Pretzel Crust
1/2 cup butter or margarine, softened
2 tablespoons brown sugar
1-2/3 cups crushed pretzels
Cake Batter
1 box devil’s food cake mix
1 small box Jello instant chocolate fudge pudding mix
8 oz sour cream
1 c applesauce
4 eggs
1/2 c milk
1 tsp vanilla extract
Caramel Cream Filling
5 tablespoons flour1 cup milk
1 teaspoon vanilla
1 cup butter
1 cup granulated sugar (not Powdered Sugar!)
1/2 cup caramel topping
Frosting
(if you want your frosting piled high like mine were, double this recipe)
1 cup butter (no substitutes), softened
4 1/2 cups confectioners' sugar
1 1/4 cups baking cocoa
1/2 teaspoon vanilla extract
1/2 cup milk
Preheat oven to 350 degrees F (175 degrees C). Crush the pretzels. I used a food processor, but putting the pretzels in a ziploc bag and crushing them that way works, too. You want to get them pretty fine so you can get an even layer.
In a medium bowl, mix together the crust ingredients. Drop a small scoop of the crust mixture into the bottom of each cup (either a sprayed muffin pan or silicone cups). Use a small glass to pack them down to a firm crust. Bake for 8-10 minutes. Set aside to cool.
While those are baking, combine all the batter ingredients. Mix well until the batter is well combined. Drop a small spoonful of batter onto each pretzel crust. Bake at 350 degrees for 20-22 minutes until a toothpick inserted in the center comes out clean. While cupcakes are cooling, make the caramel cream filling!
To make the filling, in a small saucepan, whisk flour into milk and heat, stirring constantly, until it thickens. You want it to be very thick, thicker than cake mix, more like a brownie mix is. Remove from heat and let it cool to room temperature. It must be completely cool before you use it in the next step. Stir in vanilla.
While the mixture is cooling, cream the butter and sugar together until light and fluffy. You don’t want any sugar graininess left. Then add the completely cooled milk/flour/vanilla mixture as well as the caramel topping and beat it for about 10 minutes. That may seem like a long time, but believe me it makes it so light and fluffy and SO AMAZING. If it looks separated, you haven’t beaten it enough! Beat it until it all combines and resembles whipped cream. If it seems really runny, then add a little bit of powdered sugar. I needed to add just a little, and then it was PERFECT!
Hull the cupcakes the make a perfect little nest for the caramel cream.
I used a big star tip to fill the cupcake holes. Make sure they are filled all the way to the top, because you are not going to want to skimp on this stuff!
Finally, make the frosting! Cream 1 cup of softened butter with a mixer. Gradually beat in confectioners' sugar, cocoa and vanilla. Add milk until frosting reaches spreading consistency.
Time to frost! I used a pastry bag with no tip and did a swirl. After frosting, sprinkle some sea salt on the top for a finishing touch!
And finally, DIG IN!
Salty yet sweet amazingness!
-alyssa*
strawberry filled cupcakes w/ laffy taffy frosting*
By Unknown
on |
0
comments
We made these cupcakes last week for all of the students. It may be selfish, but I actually chose to make these because I don't like strawberry flavored things. I like strawberries, but not most strawberry flavored things. They are just so sweet and..I don't now. There is just something about strawberry flavored things that rub me the wrong way. Anyway, I have been very successful eating healthy and I didn't want to fail so early on :). I did try a little tid-bit, and I wasn't a huge fan, but everyone else I talked to loved them! I think I didn't like it too much because it was strawberry flavored, of course, but also because of the buttercream. I am really beginning to think I am not a fan of buttercream. I am still not ready to make it official, however.
Strawberry Filled Cupcakes with Laffy Taffy Frosting
adapted from Real Mom Kitchen
1 box white cake mix
1 (10 oz jar) Smucker’s Simply Fruit Strawberry Spreadable Fruit
2 cups whipped topping
red food coloring
Sprinkles
Prepare cake mix according to the directions. Line muffin tin with cupcake liners and fill them 3/4 the way full. Bake according to the directions on the box.
In a medium bowl, combine the spreadable fruit and whipped topping. You will notice the coloring is not all that attractive, so add a couple of drops of red food coloring. Now that's better! This will be your filling for the cupcakes :).
When the cupcakes are nice and cool, hull out the middles. Put your fruit/whipped topping mixture in a pastry bag (I used a star tip) and squeeze in the filling.
Top with the laffy taffy frosting (recipe below).
Laffy Taffy Frosting
***This frosting is enough to cover all of the cupcakes but if you want it piled on on the cupcakes like I did in the photo then you will want to double this amount.***
- 10 pieces of strawberry Laffy Taffy candy (the fun sized ones)
- 2 Tbsp. heavy cream
- 1 cup butter, room temperature
- 2 cups powdered sugar
In a small sauce pan, melt the taffy and the heavy cream together stirring until the mixture is smooth.
Remove from the heat and cool to room temperature.
While the mixture is cooling, begin preparing the frosting. In a mixing bowl, whip the butter until smooth. Mix in the powdered sugar, a half cup at a time, whipping until fluffy.
Then add the melted and cooled laffy taffy a spoonful at a time. You don’t want it too thick. If needed, place it back on the stove for a few seconds to soften it just enough. After each spoonful of the laffy taffy, turn the mixer up to high and whip the frosting until it’s fluffy. You can also add a little pink or red food coloring to get the desired shade but I was happy with the color as it was.
Frost the cupcakes with the laffy taffy frosting and top with sprinkles. Makes 22-24 cupcakes.
And last, but not least, DIG IN!
-alyssa*
root beer float cupcakes*
By Unknown
on |
0
comments
When I had my little sister's baby shower, my mom brought me this recipe. I thought that it would be perfect for the students because most of them seem to love root beer! I also thought it would be the perfect way to kick off some better weather! Lately it has actually been quite nice. The past month or maybe even more I think it rained everyday but maybe 4 or 5. I could never live in a state where rain is frequent. After this last month I am 100% positive that I would have major depression issues, not to mention I would not be a very pleasant person to be around. I need my sun. It does miracles for my mood.
I went to a cooking class last night at the Blue Lemon in Highland. I have yet to eat there, but I have been to a couple cooking classes and they are so fun! Chef Todd (executive chef of Blue Lemon and also a culinary professor at UVU) teaches the class and he is so awesome! This class was on summer salads and he did an antipasto, 3 different types of bruschetta (my favorite), a shrimp louis, a roasted red pepper dressing and citrus vinaigrette, and a watermelon and jicama salad. All of which were pretty amazing! He is so funny and really gives you good tips when cooking. Then, the best part, he lets you taste all of his creations! Last night he actually plated up each one of his dishes for each person in the class. The classes I have been to previous we just went up and helped ourselves to the dishes, but last night he must have been extra rambunctious. It gave me some great ideas in different ways that we can present our food when we do the sports banquets and other events around campus. I wanted to take pictures of all of the amazing salads that he made, but I thought people would think I was psycho so decided against it. Maybe next week (which is dutch oven cooking - mmmm!).
Ok, back to root beer float cupcakes. Sorry, I get side tracked easily. These cupcakes were so easy to make! They really had a very distinct root beer flavor, which mainly came from the root beer buttercream frosting. The cupcake had a slight root beer flavor, but it would definitely have more if you added actual root beer extract, maybe even on top of the root beer. I'll be honest though, I don't know if I would make this cupcake again. I think I discovered that I am not the biggest fan of buttercream frosting. Or maybe just the last couple that I have tried from various recipes. I would much rather have a cream cheese or the flour based frosting that I use. But I haven't ventured off to all of my avenues, so I am not ready to make my buttercream dislikingness official.
Rootbeer Float Cupcakes
from 101 Gourmet Cupcakes in 10 Minutes and as seen on Confessions of a Cookbook Queen
Ingredients
1 box white cake mix (I always use Duncan Hines)
1 cup of your favorite root beer
1 recipe buttercream (here's a link to the confession's of a cookbook queen's recipe)
1 teaspoon root beer extract
Preheat oven to 350. Line 24 muffin tins with paper liners.
Mix together root beer and cake mix (yes, just those two ingredients). Pour into paper liners and fill 3/4 full.
Bake for 15 to 18 minutes or until cake springs back when lightly touched. Remove from oven and allow to completely cool.
1 box white cake mix (I always use Duncan Hines)
1 cup of your favorite root beer
1 recipe buttercream (here's a link to the confession's of a cookbook queen's recipe)
1 teaspoon root beer extract
Preheat oven to 350. Line 24 muffin tins with paper liners.
Mix together root beer and cake mix (yes, just those two ingredients). Pour into paper liners and fill 3/4 full.
Bake for 15 to 18 minutes or until cake springs back when lightly touched. Remove from oven and allow to completely cool.
In a separate bowl, mix the buttercream frosting and root beer flavoring. Frost cooled cupcakes.
Then you can top them however your little heart desires. I picked a mini marshmallow and a drizzle of caramel. I just looked up what other people have done and one of the favorites seems to be a marachino cherry. There was even one person that made a well in the middle of the frosting and did a tiny scoop of vanilla ice cream! Now THAT would be a rootbeer float cupcake! I have said it once and I will say it again, I love people and the amazing things that they do! They never ceased to be absolutely and jealously amazed me!
-alyssa*
cookies and cream mini cupcakes*
By Unknown
on |
1 comments
Last week I came home from work and decided to look through some food blogs. Before I knew it 2 1/2 hours had passed! Some people seriously amaze me! The things that they can make and create are out of this world. I think I have a food blog obsession. Even after my 2 1/2 hour look see, I would have kept going had it not been my bedtime - which was 9:30. I know, I know, I have become such a grandma. I can't help it. Sleeping is my favorite past time.
Anyway, I made these cupcakes for my little sister's baby shower this last weekend. This isn't the first time I have had them, however. Sarah and Jamie (two of my awesome staff) made them at work awhile back for Norma's (another fabulous staff of mine) baby shower that we threw her. They turned out so great and SO cute! Then, when I discovered mini Oreos I just knew that I would have to make them for Shea's baby shower! I knew they would make a nice compliment to the key lime pie mini cupcakes.
Cookies and Cream Cupcakes
adapted from Annie's Eats
Yield: 24 cupcakes (about 50 if making mini cupcakes)
Ingredients:
For the cupcakes:
24 Oreo halves, with cream filling attached
2¼ cups all-purpose flour
1 tsp. baking powder
½ tsp. salt
8 tbsp. unsalted butter, at room temperature
1 2/3 cup sugar
3 large egg whites, at room temperature
2 tsp. vanilla extract
1 cup milk
20 Oreo cookies, coarsely chopped (I quarter them)
The Best Frosting EVER
from Made Famous By
5 Tablespoons Flour
1 cup Milk
1 teaspoon Vanilla
1 cup Butter
1 cup Granulated Sugar (not Powdered Sugar!)
For garnish:
Oreo cookie crumbs
24 Oreo cookie halves (mini if you are making mini cupcakes)
Directions:
Preheat the oven to 350˚ F. Line the wells of two cupcake pans with 24 paper liners. Place an Oreo halve in the bottom of each liner, cream side up.
In a medium bowl, combine the flour, baking powder and salt; stir together with a fork to blend and set aside. In the bowl of an electric mixer, combine the butter and sugar and beat together on medium-high speed until light and fluffy, about 2 minutes. Blend in the egg whites one at a time, beating well after each addition. Blend in the vanilla extract. With the mixer on low speed, beat in half of the dry ingredients just until incorporated. Add the milk and beat just until combined, then mix in the remaining dry ingredients. Gently fold in the chopped Oreos with a rubber spatula until evenly incorporated, being careful not to over-mix.
Evenly divide the batter between the prepared cupcake liners. Bake for 18-20 minutes, rotating the pans halfway through baking, until a toothpick inserted in the center comes out clean. Allow to cool in the pans 5-10 minutes, then transfer to a wire rack to cool completely.
To make the frosting, in a small saucepan, whisk flour into milk and heat, stirring constantly, until it thickens. You want it to be very thick, thicker than cake mix, more like a brownie mix is. Remove from heat and let it cool to room temperature. (If I’m in a hurry, I place the saucepan over ice in the sink for about 10 minutes or so until the mixture cools.) It must be completely cool before you use it in the next step. Stir in vanilla.
While the mixture is cooling, cream the butter and sugar together until light and fluffy. You don’t want any sugar graininess left. Then add the completely cooled milk/flour/vanilla mixture and beat the living daylights out of it. If it looks separated, you haven’t beaten it enough! Beat it until it all combines and resembles whipped cream.
Frost the cooled cupcakes as desired. Sprinkle with Oreo crumbs and garnish with Oreo halves.
Just about cute enough to eat, huh!
-alyssa*
Anyway, I made these cupcakes for my little sister's baby shower this last weekend. This isn't the first time I have had them, however. Sarah and Jamie (two of my awesome staff) made them at work awhile back for Norma's (another fabulous staff of mine) baby shower that we threw her. They turned out so great and SO cute! Then, when I discovered mini Oreos I just knew that I would have to make them for Shea's baby shower! I knew they would make a nice compliment to the key lime pie mini cupcakes.
Cookies and Cream Cupcakes
adapted from Annie's Eats
Yield: 24 cupcakes (about 50 if making mini cupcakes)
Ingredients:
For the cupcakes:
24 Oreo halves, with cream filling attached
2¼ cups all-purpose flour
1 tsp. baking powder
½ tsp. salt
8 tbsp. unsalted butter, at room temperature
1 2/3 cup sugar
3 large egg whites, at room temperature
2 tsp. vanilla extract
1 cup milk
20 Oreo cookies, coarsely chopped (I quarter them)
The Best Frosting EVER
from Made Famous By
5 Tablespoons Flour
1 cup Milk
1 teaspoon Vanilla
1 cup Butter
1 cup Granulated Sugar (not Powdered Sugar!)
For garnish:
Oreo cookie crumbs
24 Oreo cookie halves (mini if you are making mini cupcakes)
Directions:
Preheat the oven to 350˚ F. Line the wells of two cupcake pans with 24 paper liners. Place an Oreo halve in the bottom of each liner, cream side up.
In a medium bowl, combine the flour, baking powder and salt; stir together with a fork to blend and set aside. In the bowl of an electric mixer, combine the butter and sugar and beat together on medium-high speed until light and fluffy, about 2 minutes. Blend in the egg whites one at a time, beating well after each addition. Blend in the vanilla extract. With the mixer on low speed, beat in half of the dry ingredients just until incorporated. Add the milk and beat just until combined, then mix in the remaining dry ingredients. Gently fold in the chopped Oreos with a rubber spatula until evenly incorporated, being careful not to over-mix.
Evenly divide the batter between the prepared cupcake liners. Bake for 18-20 minutes, rotating the pans halfway through baking, until a toothpick inserted in the center comes out clean. Allow to cool in the pans 5-10 minutes, then transfer to a wire rack to cool completely.
To make the frosting, in a small saucepan, whisk flour into milk and heat, stirring constantly, until it thickens. You want it to be very thick, thicker than cake mix, more like a brownie mix is. Remove from heat and let it cool to room temperature. (If I’m in a hurry, I place the saucepan over ice in the sink for about 10 minutes or so until the mixture cools.) It must be completely cool before you use it in the next step. Stir in vanilla.
While the mixture is cooling, cream the butter and sugar together until light and fluffy. You don’t want any sugar graininess left. Then add the completely cooled milk/flour/vanilla mixture and beat the living daylights out of it. If it looks separated, you haven’t beaten it enough! Beat it until it all combines and resembles whipped cream.
Frost the cooled cupcakes as desired. Sprinkle with Oreo crumbs and garnish with Oreo halves.
Just about cute enough to eat, huh!
-alyssa*
key lime pie cupcakes*
By Unknown
on |
0
comments
This weekend I threw a baby shower for my little sis. She is having a little baby boy and she is due on June 26th. I have had so much fun shopping and planning - and did I mention shopping? - for the baby shower. We had a great time and it all turned out so cute. My sister also got some awesome and cute cute stuff! Almost makes me want to have a baby - almost :).
On the menu for the baby shower was key lime pie mini cupcakes, cookies and cream mini cupcakes, cake pops, chocolate lollipops, fruit kabobs, and some yummy raspberry ice sparkler to drink. I am going to start with the key lime pie mini cupcakes.
My coordinator, Sarah, actually made these awhile back for a bridal shower and brought some that she had left to work the next day. I fell in love immediately and knew I would have to make these for the shower! They have the perfect amount of citrus and they have such a cute presentation. They were just perfect for this cute little occasion! Want to see pictures of everything?? All recipes coming soon :).
Key Lime Pie Mini Cupcakes
adapted from Culinary Concoctions
Mom’s Favorite White Cake
2-1/4 cups cake flour
1 tablespoon baking powder
1/2 teaspoon salt
1/2 cup butter, softened
1-1/2 cups sugar
4 egg whites
2 teaspoons vanilla
1 cup milk
zest of 6 key limes or 1 large lime
Preheat oven to 350°F. Grease and flour cupcake pans(or use liners).
Combine flour, baking powder and salt in medium bowl; set aside.
Beat butter and sugar in large bowl with electric mixer at medium speed until light and fluffy. Add egg whites, two at a time, beating well after each addition. Add vanilla; beat until blended. Add lime zest. With electric mixer at low speed, add flour mixture alternately with milk, beating well after each addition. Pour batter evenly into prepared pan.
Bake 20-22 minutes(for full size cupcakes) and 15 minutes(for mini) or until wooden toothpick inserted into centers comes out clean. Cool cupcakes in pan on wire rack 10 minutes. Remove from pan and allow to cool completely on rack.
While the mixture is cooling, cream the butter and sugar together until light and fluffy. You don’t want any sugar graininess left. Then add the completely cooled milk/flour/vanilla mixture and beat the living daylights out of it. If it looks separated, you haven’t beaten it enough! Beat it until it all combines and resembles whipped cream.
To assemble:
Take key lime pie filling and place into a pastry bag fitted with a small tip. Take tip and place into cupcake squeeze filling into cupcake.
Frost cupcake and sprinkle with crushed graham crackers.
I need to give a special thanks to my bestest best friend in the whole world, Ashley, for helping me plan this whole thing and especially for her help with all of the fun games! I love you, girl!
THANKS a billion! Also, a big thanks to my in-laws for helping set up and for all of their support! Oh, and I cannot forget my cute cousin, Marinda, for taking some awesome pictures throughout the shower! She took the one above of Ashley and I and posed us with those crazy faces! THANKS MARINDA - you did an awesome job!
Thanks everyone for coming! It was definitely a great time :).
Shea (my cute little sister) and I
My coordinator, Sarah, actually made these awhile back for a bridal shower and brought some that she had left to work the next day. I fell in love immediately and knew I would have to make these for the shower! They have the perfect amount of citrus and they have such a cute presentation. They were just perfect for this cute little occasion! Want to see pictures of everything?? All recipes coming soon :).
mini key lime pie and cookies and cream cupcakes
cake pops
chocolate lollipops
How cute are all of these little guys?? All of it was so fun to make, and even more fun to eat! Alright, it's time to get to the recipe of the yummy, tangy, delicious key lime pie cupcakes!
Key Lime Pie Mini Cupcakes
adapted from Culinary Concoctions
Mom’s Favorite White Cake
2-1/4 cups cake flour
1 tablespoon baking powder
1/2 teaspoon salt
1/2 cup butter, softened
1-1/2 cups sugar
4 egg whites
2 teaspoons vanilla
1 cup milk
zest of 6 key limes or 1 large lime
Preheat oven to 350°F. Grease and flour cupcake pans(or use liners).
Combine flour, baking powder and salt in medium bowl; set aside.
Beat butter and sugar in large bowl with electric mixer at medium speed until light and fluffy. Add egg whites, two at a time, beating well after each addition. Add vanilla; beat until blended. Add lime zest. With electric mixer at low speed, add flour mixture alternately with milk, beating well after each addition. Pour batter evenly into prepared pan.
Bake 20-22 minutes(for full size cupcakes) and 15 minutes(for mini) or until wooden toothpick inserted into centers comes out clean. Cool cupcakes in pan on wire rack 10 minutes. Remove from pan and allow to cool completely on rack.
Source: Adapted from the Editors of Easy Home Cooking Magazine
Key Lime Pie “Filling”
6 oz cream cheese softened
5 oz key lime juice
7 oz sweetened condensed milk
Place all ingredients in a mixer fitted with a paddle attachment. Mix on low for 30 seconds. Increase speed to medium and blend for 2 minutes. Place in a separate bowl and place in fridge for 2 hours.
The Best Frosting EVER
from Made Famous By
5 Tablespoons Flour
1 cup Milk
1 teaspoon Vanilla
1 cup Butter
1 cup Granulated Sugar (not Powdered Sugar!)
1 cup Milk
1 teaspoon Vanilla
1 cup Butter
1 cup Granulated Sugar (not Powdered Sugar!)
In a small saucepan, whisk flour into milk and heat, stirring constantly, until it thickens. You want it to be very thick, thicker than cake mix, more like a brownie mix is. Remove from heat and let it cool to room temperature. (If I’m in a hurry, I place the saucepan over ice in the sink for about 10 minutes or so until the mixture cools.) It must be completely cool before you use it in the next step. Stir in vanilla.
While the mixture is cooling, cream the butter and sugar together until light and fluffy. You don’t want any sugar graininess left. Then add the completely cooled milk/flour/vanilla mixture and beat the living daylights out of it. If it looks separated, you haven’t beaten it enough! Beat it until it all combines and resembles whipped cream.
To assemble:
Take key lime pie filling and place into a pastry bag fitted with a small tip. Take tip and place into cupcake squeeze filling into cupcake.
Frost cupcake and sprinkle with crushed graham crackers.
I need to give a special thanks to my bestest best friend in the whole world, Ashley, for helping me plan this whole thing and especially for her help with all of the fun games! I love you, girl!
Ashley and I :)
THANKS a billion! Also, a big thanks to my in-laws for helping set up and for all of their support! Oh, and I cannot forget my cute cousin, Marinda, for taking some awesome pictures throughout the shower! She took the one above of Ashley and I and posed us with those crazy faces! THANKS MARINDA - you did an awesome job!
Marinda and I
Thanks everyone for coming! It was definitely a great time :).
-alyssa*
chocolate cupcake w/ peanut butter frosting and nutella ganache*
By Unknown
on |
0
comments
Say that fast 10 times! These cupcakes are nothing short of AMAZING. They are melt in your mouth peanut butter chocolate gooey goodness! We made these for parent conference this last weekend and they were a hit. I had a slight meltdown because the frosting started falling off some of the cupcakes, but with some quick thinking I stuck them in the freezer and they were good as new.
I was worried the recipe for the frosting didn't make enough, so I added some whipped topping to the frosting and it still tasted so yummy! The frosting alone I could literally eat for a week straight. This is my new favorite frosting recipe. I don't know what it is, but add flour and granulated sugar instead of powdered sugar to your frosting and you will have the lightest, fluffiest, most delicious frosting which strongly resembles whipped cream. There is a frosting that we have made before that said that after you cook your flour and milk to put it through a sifter. This recipe did not say to do that and it turned out just as good, maybe even better, than the sifted recipe. So you can skip that annoying step and get just as good results! Sign me up!
Also, the nutella ganache didn't thicken up like I thought it would, so I added some chocolate chips and covered it for 5 minutes while the nutella and cream was still hot, then uncovered and stirred. That thickened it up nicely so that I could coat my cupcakes more easily and not so runny and messy. If yours thickens up like a normal ganache, then don't fret about the chocolate chips.
Chocolate Cupcake w/ Peanut Butter Frosting and Nutella Ganache
from Made Famous By
Chocolate Cupcakes
**This recipe will also make an amazing cake**
1 (18.25 ounce) package devil's food cake mix
1 (5.9 ounce) package instant chocolate pudding mix
1 cup sour cream
1 cup vegetable oil
4 eggs, lightly beaten
2 teaspoons pure vanilla extract
Assemble them like this: Fill them with the peanut butter frosting with Reeses, put a layer of Nutella Ganache on the top of the cupcake (stay away from the edges), frost the cupcakes with the peanut butter frosting, drizzle with nutella ganache, then cut a reeses in half (I did fourths) to add it to the top.
Peanut Butter Frosting
*Adapted from the best frosting EVER!*
Nutella Ganache
2 C Nutella
2 C Heavy Cream
Put the Nutella and heavy cream in a bowl and heat it in the microwave for 1 minute. Take it out and stir it. If it is not melted enough heat it for another minute.
-alyssa*
I was worried the recipe for the frosting didn't make enough, so I added some whipped topping to the frosting and it still tasted so yummy! The frosting alone I could literally eat for a week straight. This is my new favorite frosting recipe. I don't know what it is, but add flour and granulated sugar instead of powdered sugar to your frosting and you will have the lightest, fluffiest, most delicious frosting which strongly resembles whipped cream. There is a frosting that we have made before that said that after you cook your flour and milk to put it through a sifter. This recipe did not say to do that and it turned out just as good, maybe even better, than the sifted recipe. So you can skip that annoying step and get just as good results! Sign me up!
Also, the nutella ganache didn't thicken up like I thought it would, so I added some chocolate chips and covered it for 5 minutes while the nutella and cream was still hot, then uncovered and stirred. That thickened it up nicely so that I could coat my cupcakes more easily and not so runny and messy. If yours thickens up like a normal ganache, then don't fret about the chocolate chips.
Chocolate Cupcake w/ Peanut Butter Frosting and Nutella Ganache
from Made Famous By
Chocolate Cupcakes
**This recipe will also make an amazing cake**
1 (18.25 ounce) package devil's food cake mix
1 (5.9 ounce) package instant chocolate pudding mix
1 cup sour cream
1 cup vegetable oil
4 eggs, lightly beaten
2 teaspoons pure vanilla extract
1/2 cup water
Directions
1. Preheat oven to 350 degrees F. Line muffin tin with paper liners or spray with non-stick cooking spray.
2. In the bowl of a stand mixer, fitted with the paddle attachment, or with a hand mixer in a large bowl, beat together the cake and pudding mixes, sour cream, oil, eggs, vanilla and water. Beat for about two minutes on medium speed until well combined.
3. Using a large cookie scoop, distribute the batter between 24 muffin wells.
4. Bake in preheated oven for 18-22 minutes or until the tops of the cakes spring back when lightly touched. . Allow cupcakes to cool inside muffin tins for about 10 minutes.
5. Remove cupcakes from muffin tins and allow to fully cool on a wire rack. Once cupcakes are cool, take a little of the middle out to prepare them for the stuffing.
Assemble them like this: Fill them with the peanut butter frosting with Reeses, put a layer of Nutella Ganache on the top of the cupcake (stay away from the edges), frost the cupcakes with the peanut butter frosting, drizzle with nutella ganache, then cut a reeses in half (I did fourths) to add it to the top.
Peanut Butter Frosting
*Adapted from the best frosting EVER!*
5 Tablespoons Flour
1 cup Milk
1 teaspoon Vanilla
1 cup Butter
1 cup Granulated Sugar (not Powdered Sugar!)
1 cup Milk
1 teaspoon Vanilla
1 cup Butter
1 cup Granulated Sugar (not Powdered Sugar!)
1/4 C Peanut Butter
6 Reeses Peanut Butter cups (chopped)
Directions
Directions
In a small saucepan, whisk flour into milk and heat, stirring constantly, until it thickens. You want it to be very thick, thicker than cake mix, more like a brownie mix is. Remove from heat and let it cool to room temperature. (If I’m in a hurry, I place the saucepan over ice in the sink for about 10 minutes or so until the mixture cools.) It must be completely cool before you use it in the next step. Stir in vanilla.
While the mixture is cooling, cream the butter and sugar together until light and fluffy. You don’t want any sugar graininess left. Then add the completely cooled milk/flour/vanilla mixture and beat the living daylights out of it. If it looks separated, you haven’t beaten it enough! Beat it until it all combines and resembles whipped cream.
** Reserve a cup of the frosting when you are done making it and add the chopped up Reese's Peanut Butter cups to it. Use this mixture to put in the hole you made in the cupcakes then frost the cup cakes with the regular frosting.
Nutella Ganache
2 C Nutella
2 C Heavy Cream
Put the Nutella and heavy cream in a bowl and heat it in the microwave for 1 minute. Take it out and stir it. If it is not melted enough heat it for another minute.
-alyssa*
key lime cupcakes w/ blackberry filling and blackberry frosting*
By Unknown
on |
0
comments
Happy Cinco de Mayo! On that note, this recipe has nothing to do with Cinco de Mayo. Sorry! However, I'm not going to let you down. These cupcakes are one of the most amazing things I have eaten to date. Seriously. They are AMAZING!
Before I get to the cupcakes, I have some great news! Our deck is complete, stain and all! When I got home from work today the husband was out getting all of our patio furniture out of the shed and my heart skipped a beat, I'm pretty sure! My backyard is by far my favorite part of my house, and we spend endless hours back there during the summer. When that patio furniture comes out, that brings hope that maybe we will enter Spring/Summer. So far it's been pure winter. Thank you 70 degrees for showing your lovely face today! You are more than welcome!
Now, it is time to introduce you to my new favorite kitchen gadget. Last week I entered my new favorite store for the first time. Williams Sonoma. If you have never been there, GO. Especially if you love to cook! Unless you are on a tight budget. Then don't go. Because you will not be able to stop thinking about the amazing things in that beautiful store. The things in that store make my mind go crazy thinking of all of the amazing and delicious things I can make with the help of their many gadgets! Including this one:
That's right folks. A gadget to core your cupcakes! Throw your pairing knife aside and go to Williams Sonoma right now and purchase this little guy! Or click here and purchase your next favorite gadget online. It will be the best $5.00 you ever spent - guaranteed! As you scroll down through this amazing cupcake recipe, please stop to admire the picture with the lovely cupcakes with a perfect little hole cut right out of them! That, my friends, is the result of the precise work of this little guy!
Before I get to this amazing cupcake recipe, I thought I should say something. If you are an avid blog reader of mine (thank you SO much by the way!), I promise I do not feed the students very sugary, unhealthy desserts everyday. It probably seems like it, because I post so many goodies on here. That is simply because I am obsessed with desserts and love to blog about them! I have about 20+ recipes that I have yet to put on here, but I just cannot wait to post the desserts first. The students actually get dessert once a week. Some recipes are from different activities we do around campus, or recipes I make at home. So in case you were wondering, my goal is not to make the students the size of elephants :).
Key Lime Cupcakes w/ Blackberry Filling and Blackberry Frosting
adapted from Baked Perfection
makes 30 cupcakes
1 cup butter, softened
2 cups sugar
3 eggs
2 teaspoon vanilla extract
4 tablespoons key lime juice
zest of two limes
2 1/2 cups all-purpose flour
1 teaspoon baking soda
1/2 teaspoon baking powder
1/2 teaspoon salt
2 cups sour cream
Preheat oven to 350 degrees Fahrenheit. Grease or paper-line 30 baking cups.
In a medium bowl combine the flour, baking soda, baking powder, and salt. In a separate mixing bowl, cream the butter and sugar. Beat in the eggs, one at a time. Add the vanilla, key lime juice and lime zest; mix well. Add the flour mixture to creamed mixture alternately with sour cream (batter will be thick).
Fill muffin cups with 1/4 cup of batter. Bake at 350 degrees F for 20-25 minutes or until a toothpick inserted near the center comes out clean. Cool completely and frost as desired.
Blackberry Filling
recipe from Baked Perfection
1 32oz container frozen blackberries
3 tablespoons sugar
Juice of one lemon
3 tablespoons cornstarch
pinch of salt
Place blackberries in a small bowl and sprinkle with sugar, let thaw. Drain blackberries, reserving liquid. Squish the blackberries and push through a fine mesh sieve to remove the seeds, set aside. Add enough water to the blackberry liquid to equal 1 cup. In a large saucepan, combine the blackberry liquid, lemon juice, cornstarch, and salt. Heat and stir until the mixture boils and thickens. Cool completely. Stir blackberries into the cooled mixture. Refrigerate until ready to use. (This can be made several days in advance and any leftovers works well on toast, on pancakes, or mixed in plain Greek Yogurt.)
*Note: I needed a little more filling for all my 180 cupcakes, so we folded in some pre-made whipped cream and it turned out DELICIOUS! I would HIGHLY recommend it!
Blackberry Buttercream
recipe from Baked Perfection
2 sticks butter, softened
1 tsp vanilla extract
1/3 cup blackberry filling (seedless blackberry jam or preserves can be substituted)
pinch of salt
6 cups powdered sugar
2-3 tablespoons milk
Beat butter and vanilla until creamy. Mix in blackberry filling and salt. Add powdered sugar 1 cup at a time, beating until combined. Add milk 1 tablespoon at a time until you reach desired consistency.
To assemble the cupcakes, remove the middles (using the awesome cupcake corer above or a pairing knife will work, too).
Pipe your blackberry filling into the hole.
Then frost your cupcakes with the blackberry filling. I frosted them with a piping bag that had no tip and then swirled it on. Top with a fresh blackberry, if desired.
These cupcakes are TO DIE for! We had some leftover filling, frosting and then the middles out of the cupcakes, and I think I ate about 1/2 the middles (from 180 cupcakes keep in mind) and tons of the filling and frosting all to myself! And then I ate a cupcake! They are so fruity, and the key lime cupcakes have just the right amount of citrus, and together they create the most amazing, refreshing, tangy cupcake! Please make these. I beg you!!! Oh, and get out there and enjoy this warm weather!
-alyssa*
Before I get to the cupcakes, I have some great news! Our deck is complete, stain and all! When I got home from work today the husband was out getting all of our patio furniture out of the shed and my heart skipped a beat, I'm pretty sure! My backyard is by far my favorite part of my house, and we spend endless hours back there during the summer. When that patio furniture comes out, that brings hope that maybe we will enter Spring/Summer. So far it's been pure winter. Thank you 70 degrees for showing your lovely face today! You are more than welcome!
Now, it is time to introduce you to my new favorite kitchen gadget. Last week I entered my new favorite store for the first time. Williams Sonoma. If you have never been there, GO. Especially if you love to cook! Unless you are on a tight budget. Then don't go. Because you will not be able to stop thinking about the amazing things in that beautiful store. The things in that store make my mind go crazy thinking of all of the amazing and delicious things I can make with the help of their many gadgets! Including this one:
That's right folks. A gadget to core your cupcakes! Throw your pairing knife aside and go to Williams Sonoma right now and purchase this little guy! Or click here and purchase your next favorite gadget online. It will be the best $5.00 you ever spent - guaranteed! As you scroll down through this amazing cupcake recipe, please stop to admire the picture with the lovely cupcakes with a perfect little hole cut right out of them! That, my friends, is the result of the precise work of this little guy!
Before I get to this amazing cupcake recipe, I thought I should say something. If you are an avid blog reader of mine (thank you SO much by the way!), I promise I do not feed the students very sugary, unhealthy desserts everyday. It probably seems like it, because I post so many goodies on here. That is simply because I am obsessed with desserts and love to blog about them! I have about 20+ recipes that I have yet to put on here, but I just cannot wait to post the desserts first. The students actually get dessert once a week. Some recipes are from different activities we do around campus, or recipes I make at home. So in case you were wondering, my goal is not to make the students the size of elephants :).
Key Lime Cupcakes w/ Blackberry Filling and Blackberry Frosting
adapted from Baked Perfection
makes 30 cupcakes
1 cup butter, softened
2 cups sugar
3 eggs
2 teaspoon vanilla extract
4 tablespoons key lime juice
zest of two limes
2 1/2 cups all-purpose flour
1 teaspoon baking soda
1/2 teaspoon baking powder
1/2 teaspoon salt
2 cups sour cream
Preheat oven to 350 degrees Fahrenheit. Grease or paper-line 30 baking cups.
In a medium bowl combine the flour, baking soda, baking powder, and salt. In a separate mixing bowl, cream the butter and sugar. Beat in the eggs, one at a time. Add the vanilla, key lime juice and lime zest; mix well. Add the flour mixture to creamed mixture alternately with sour cream (batter will be thick).
Fill muffin cups with 1/4 cup of batter. Bake at 350 degrees F for 20-25 minutes or until a toothpick inserted near the center comes out clean. Cool completely and frost as desired.
Blackberry Filling
recipe from Baked Perfection
1 32oz container frozen blackberries
3 tablespoons sugar
Juice of one lemon
3 tablespoons cornstarch
pinch of salt
Place blackberries in a small bowl and sprinkle with sugar, let thaw. Drain blackberries, reserving liquid. Squish the blackberries and push through a fine mesh sieve to remove the seeds, set aside. Add enough water to the blackberry liquid to equal 1 cup. In a large saucepan, combine the blackberry liquid, lemon juice, cornstarch, and salt. Heat and stir until the mixture boils and thickens. Cool completely. Stir blackberries into the cooled mixture. Refrigerate until ready to use. (This can be made several days in advance and any leftovers works well on toast, on pancakes, or mixed in plain Greek Yogurt.)
*Note: I needed a little more filling for all my 180 cupcakes, so we folded in some pre-made whipped cream and it turned out DELICIOUS! I would HIGHLY recommend it!
Blackberry Buttercream
recipe from Baked Perfection
2 sticks butter, softened
1 tsp vanilla extract
1/3 cup blackberry filling (seedless blackberry jam or preserves can be substituted)
pinch of salt
6 cups powdered sugar
2-3 tablespoons milk
Beat butter and vanilla until creamy. Mix in blackberry filling and salt. Add powdered sugar 1 cup at a time, beating until combined. Add milk 1 tablespoon at a time until you reach desired consistency.
To assemble the cupcakes, remove the middles (using the awesome cupcake corer above or a pairing knife will work, too).
Please take a second to admire the precision of these cupcake holes :)
Pipe your blackberry filling into the hole.
Then frost your cupcakes with the blackberry filling. I frosted them with a piping bag that had no tip and then swirled it on. Top with a fresh blackberry, if desired.
These cupcakes are TO DIE for! We had some leftover filling, frosting and then the middles out of the cupcakes, and I think I ate about 1/2 the middles (from 180 cupcakes keep in mind) and tons of the filling and frosting all to myself! And then I ate a cupcake! They are so fruity, and the key lime cupcakes have just the right amount of citrus, and together they create the most amazing, refreshing, tangy cupcake! Please make these. I beg you!!! Oh, and get out there and enjoy this warm weather!
-alyssa*
Subscribe to:
Posts (Atom)